We shall not cease from exploration
And the end of all our exploring
Will be to arrive where we started
And know the place for the first time.
"Little Gidding"
T S Eliot

Wednesday 29 May 2013

A couple of friends, a little alcohol .... and no hangover!

Had a brilliant day yesterday with a couple of friends, when we revisited alcohol inks.  I know mine haven't seen the light of day for quite a while!

We were inspired by an article in the current Craft Stamper Magazine, so we did this version.  First, drop the ink straight from the bottle onto glossy cardstock, when dry, cut a circle and emboss it, and use as a backdrop to a stamped image.

Quite a retro look.


We then tried using the inks with laminating pouches.  Stamp up a piece of card with  silhouettes, put to one side.  Next, take a laminating pouch, and drop, dab, (the ink) and spritz (blending solution) inside the pouch; leave the ink to dry. If the stamped card is placed underneath the pouch you can gauge where to put the ink, but remember the image will be reversed when laminated inside the pouch.   Finally, laminate with the stamped card inside.  Love this, and will certainly do it again.


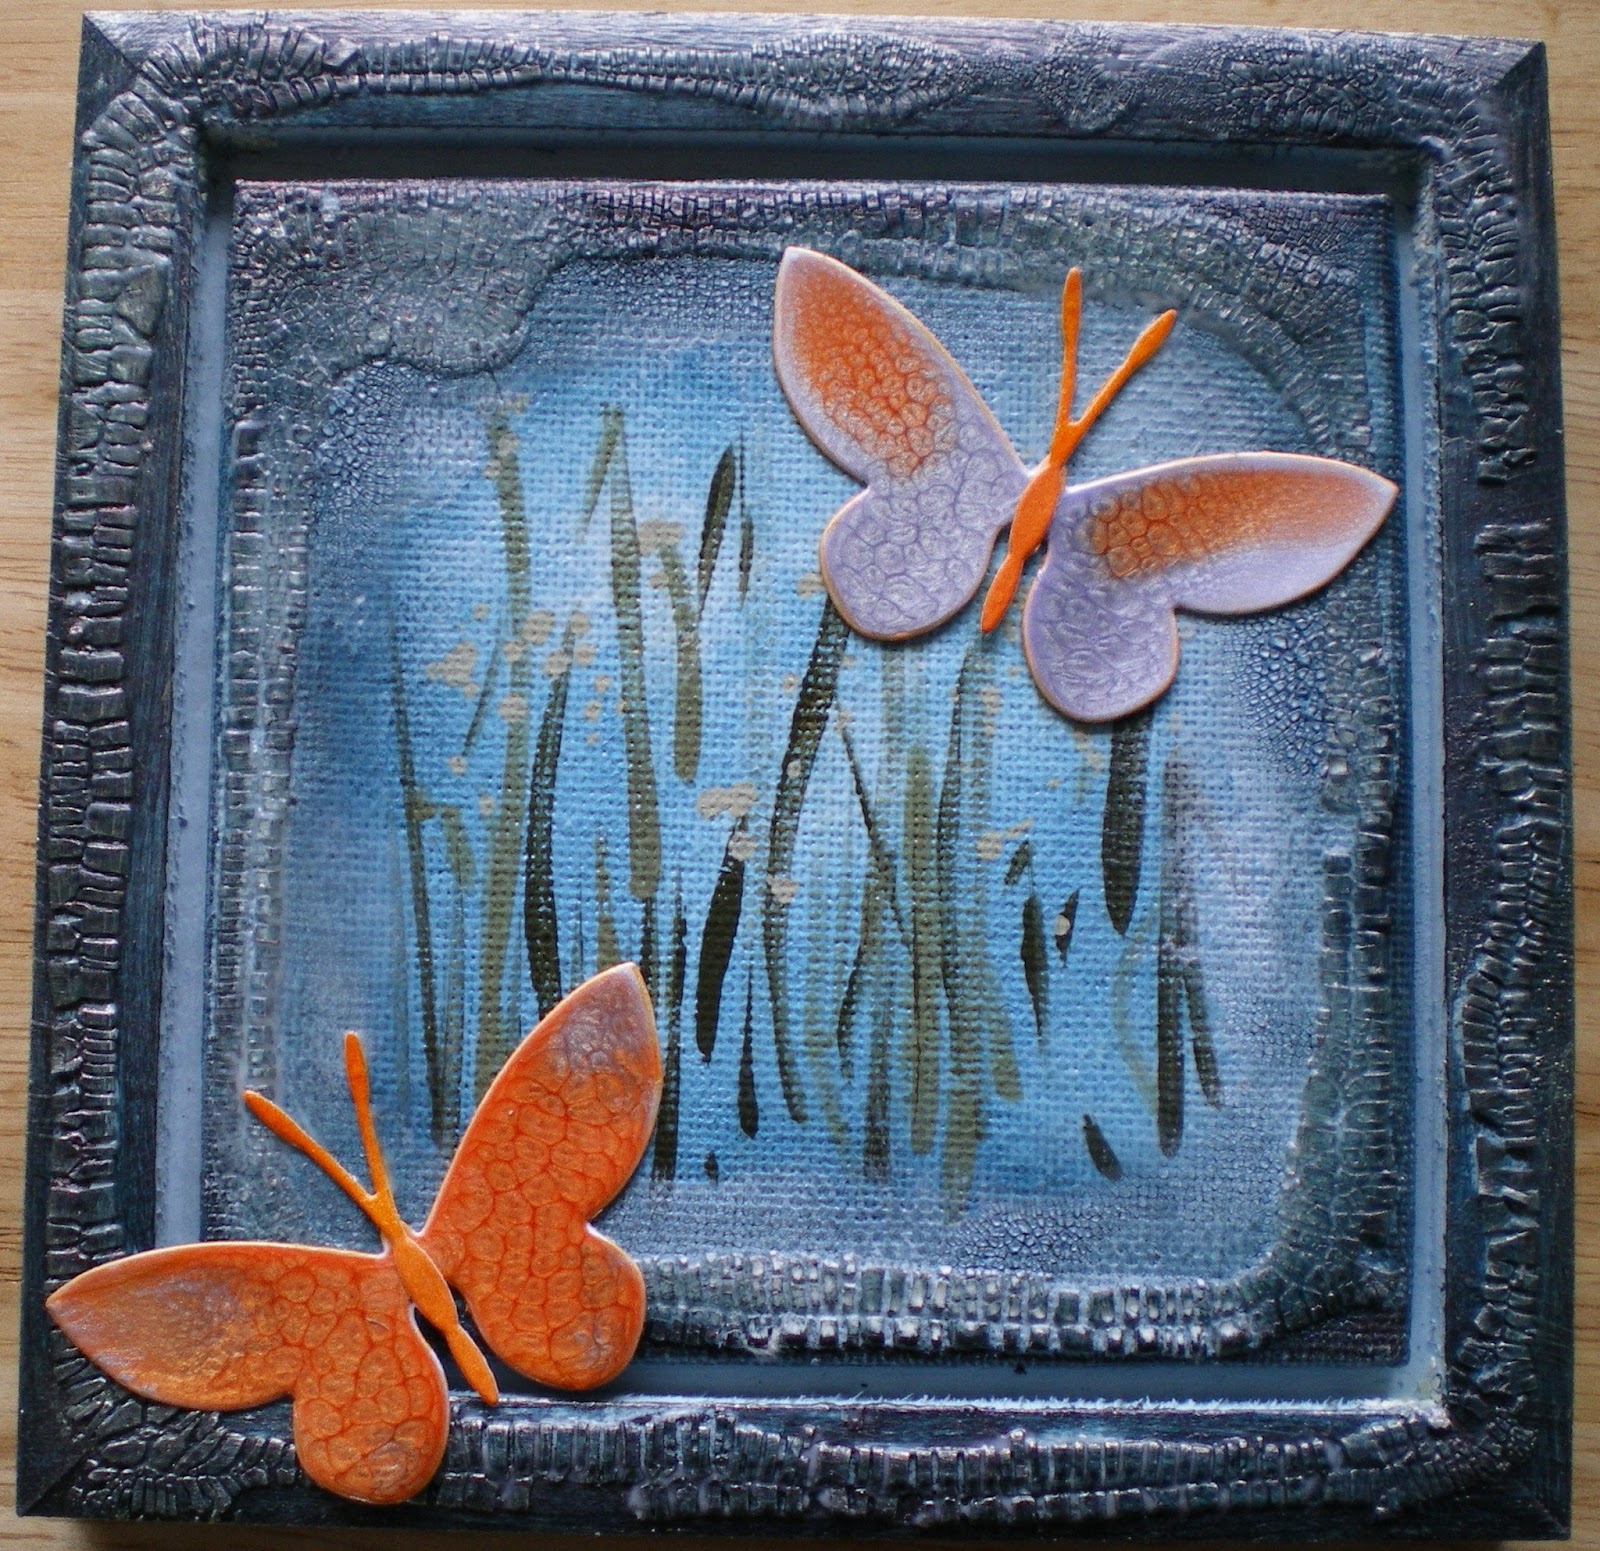
Recently I had seen an image on Pinterest (that used melted crayons) which I thought may translate to alcohol inks. Dribble some AI down a piece of non-coated card (it spreads too much on glossy card) and apply the same colours on a piece of glossy card in the normal way. Stamp and cut out a butterfly.  This certainly needs more work - too boring!


Finally, here is the CWIPS (Craftroom Work In Progress Snapshot) from yesterday.  I never said it would always be my craftroom!


Friday 24 May 2013

Bumps in the night!

Next Wednesday evening I'll be doing a demonstration at the Ashtead Card Making and Craft Club, on stencil bumping.  I love doing this technique on canvas, but I have adapted it to create backgrounds for cards.

To avoid the card going rather soggy and warped, I have not used acrylic paint alone. Create background colour with Distress Inks and Cut n Dry foam; then use a darker Distress Ink through the stencil; leave to dry. Bump the stencil slightly in one direction and use white acrylic paint through the stencil.  Don't be too fussy with it, as the white paint will react with the distress ink.

This card uses it as a background. I also love my Memory Box die of teeny birds.


This card uses it in the background and for the die-cut butterfly.


A full step by step guide will be put on the Club's blog shortly after Wednesday's get together (you will find the link on the sidebar).

Tuesday 21 May 2013

I'm cracking up .....

I recently bought some Kroma Crackle, but not had an opportunity to use it, so thought I would do a small canvas in a wood frame, with the crackle on both.  I painted the canvas, and included some impressionistic grasses.


Then spread some crackle round the edge with a palette knife, but I didn't put enough on, and the result was an apology of a crackle - more like a whisper!

So, as this stuff comes in a tube, I decided to run a line of the gel around the edge of both the canvas, and the frame, and did not touch it with a palette knife, just left it.  It took a few days to dry, but fascinatingly it cracked in a regular pattern.


 It was really unstable, probably because I did not push it down onto the surface, so I gave it a couple of coats of matt medium before I went further.

I then got my Pebeo Fantasy paints out and did some small butterflies.  Here is a peak at my desk mid-project.

This is my version of WOYWW! (What's on your workdesk Wednesday)

Think I'll call it CWIPS - craftroom work in progress snapshot!  This may be an occasional thing I include, and it may not necessarily be my desk, as sometimes I have stuff spread all over the floor!


Anyway, I digress; I used some Treasure Gold wax on the cracked bits of the frame and canvas - a deep indigo colour, and added a couple of butterflies.  This doesn't look like normal crackle, but I love the texture it has created.


Hope you noticed I've just discovered I can place photos to one side of the text  - it takes me a while, but I get there in the end!

Thursday 16 May 2013

My first book .....

When I was having my recent craft room tidy-up, I came across this past project, done some years ago, before the advent of the current journelling craze and all things mixed media.  It was at a time when I was first getting interested in altered art and decided to have a go at an altered book.  I had just started working with metal, and learning various techniques, this is reflected in the front and back covers of the book.


I used a copy of Pride & Prejudice, one of my all time favourites, which I found in a charity shop.  I have since learned that the best books to use are those that are stitch bound, as they are more robust.  This one is not stitched, and so has slightly fallen apart in some places.

There is no real theme to this book, as I was learning and trying out several techniques and layouts, experimenting with paint, glazes and stamping.  Here is a selection of the pages.

Using a cut window to show part of the following page.


For these pages, I incorporated pockets, and inserted stamped and captioned images.


An acetate window ...


The next page also shows a collage I made of myself.


Finally, I cut a niche into the last third of the book, and made a goddess doll out of painted fabric interlining, beads and half a fabric flower.  Opposite is some stamped UTEE.


Reviewing this book has reminded me how much fun I had, and perhaps I'll do another one.  It also shows how far I've come with the painty, inky thing!


Sunday 12 May 2013

Playtime!

Love it when the bell goes for playtime!  Spent a fabulous day yesterday with two good (and arty) friends, creating a canvas using some airdry clay pieces.

I have been moving more and more towards dimension on a canvas, and I suppose clay was the next obvious thing to try.

We had prepared the clay pieces beforehand, to allow time to dry.  And, believe it or not, I purposely did not take any blue paint with me!  I did feel a little bereft, and I could have borrowed some, but   ... onwards without blue I said - only for a day though!

I used not only some clay pieces, but also corrugated cardboard and some string.  The clay needed the addition of a little extra glue to ensure it stayed in place.  Forgot to take a photo before any paint went on, but here it is after the first, all over, layer of paint.


Some time later, after lots of layers of my favourite Fresco paint, and a little guilding wax ... decided to name this canvas The Gilded Frog.


A couple of close-ups -


Linda went for an autumn theme, using not only clay pieces, but die-cuts too.  Love the colours.


And Rose lived up to her name with a stream of pinks, reds and a hint of blue.   Dry brushing the clay flowers and adding gilding wax, really highlights the textures.


Good company, lots of laughs, and lots of paint - what more could a girl ask!

Thursday 9 May 2013

It's a man thing!

Thought I would take advantage of being on a roll with cardmaking, and use up some more backgrounds that I had made and not used.  They all had quite a masculine feel, so went with that theme.

Stamped up panels to create a collaged look, using two or three different stamps, then used a little bleach to highlight areas.  Bleach is such a quick and effective way to add highlights, and I only put a tiny bit in a tinfoil dish, so fumes aren't a problem!  I used a small detail brush to apply the bleach, which ensures accuracy.

A friend gave me a bag of ribbons and cord that was cut off new clothing, so used some of it to wrap round the panels, then added some die-cut cogs and a sentiment.

The first card uses a background made by inking up a stencil and running through an embossing machine.  I think I've had this background since last year, so about time it was used!


Sparkle medium through a stencil for this background.


And finally, this background has a little random stamping, then modelling past through a stencil and whilst still wet, covered with embossing powder and heated.


Now for something completely different, as I feel an experimental canvas coming on!

Sunday 5 May 2013

House of cards ....

Finished tidying the craft room, and it stayed immaculate for about half a day!  And I forgot to take a photo, .... I'll try and remember to do so next time.

I'm sure I am no different from other crafters; having a lot of partially completed stuff, or experimenting with techniques and not using the results.  So, decided to use some of this stuff up, and created a few cards.

I had stamped over a simple two-tone Pan Pastels background, then erased some of the colour away, so I added a sentiment, and black line border.


I did love doing the salt on watercolour paper technique.  Added a daisy to this one, created by  punching out some heart shapes and folding in half.


This salt background was quite beautiful, but dark - ideal for a man's card!  For the collage stamped image, highlighted areas with white wax crayon before adding the colour.  The crayon acts as a resist.


Liked using the collage stamp, so also did this one, using a background that had been stencilled with Sparkle Medium.


Time for tea!

Wednesday 1 May 2013

To die for ....

Taking a little time out at present to sort out my craft room, and do all those jobs I have been meaning to do, including cataloguing the metal dies I've accumulated.  You know how it is, I forget what I've got, and buy the same one twice!  Well, I've done that too many times now, so found a cheap spiral bound book.

Put some die-cuts on the front (with a little doodling) - well - nothing should remain undecorated!


Black pages means I can die-cut everything on cheap copy paper.


I've not quite finished - its one of those jobs you regret starting!  But at least I will now, hopefully, not buy any duplicates.  Another benefit, is seeing different shapes within a shape, which could be used in a completely different context.

Happy May Day!