We shall not cease from exploration
And the end of all our exploring
Will be to arrive where we started
And know the place for the first time.
"Little Gidding"
T S Eliot
Showing posts with label Paper Artsy 2015 Challenge. Show all posts

Tuesday, 17 November 2015

Sweet dreams ...

Collage number four on my art course was freestyle, so I decided to combine abstract with natural objects I've not used before.

My thought process was thus -

I just love the sunset moths that are found in Madagascar ...
Moth is one of the fairies in A Midsummer Night's Dream...

- I know, a bit random!

I also did some planning on this one - having learned that  with collage some sort of plan is no bad thing! So this piece is made of many layers.

First layer is a little Brusho -


Then a few skeleton leaves (which have a pale green tinge).

A couple of shapes handcut from pages (yes - from the play - I have a copy of Shakespeare's works which I cut up).

Plus a pressed gypsophila.


More Brusho -


A couple more skeleton leaves, gypsophila, some honesty seed heads, and some fine straw-like strands (which originally came from some packaging).


Finally, my version of a colourful moth, done in watercolour, with added texture from bubblewrap. I also added some splatters of gold watercolour (which is a fabulous paint by Schminck), and to balance the blue wings, a little blue Brusho too. I also die-cut the word moth from the book pages.


Still struggling with watercolour, so I've signed up for another set of classes (!) which will concentrate on watercolour techniques.

"Over hill, over dale,
Thorough bush, thorough brier,
Over park, over pale,
Thorough flood, thorough fire,
I do wander everywhere,
Swifter than the moon's sphere;
And I serve the fairy queen,
To dew her orbs upon the green.
The cowslips tall her pensioners be:
In their gold coats spots you see;
Those be rubies, fairy favours,
In those freckles live their savours:
I must go seek some dewdrops here
And hang a pearl in every cowslip's ear.
Farewell, thou lob of spirits; I'll be gone:
Our queen and all our elves come here anon."

A Midsummer Night's Dream
Act II, Scene 1
Fairy to Robin Goodfellow

The current Paper Artsy challenge is all about abstracts so ... I'm adding this one!

My thoughts are with the people of Paris - and to borrow a phrase from Robert Burns, I have never, and will never, understand man's inhumanity to man. Vive la France!


Sunday, 4 October 2015

Pin it!

I recently did a post about Tyvek (see here).  Tyvek is a man made non-woven fabric, with many uses. These include building wrap and one piece coveralls.  When heated it starts to disintegrate, giving some great effects.


I've found the best result is to paint some Tyvek with pearlised or metallic acrylic paint; the paint should not be too thick.  When dry, choose some fabric that colour co-ordinates (I've used felt), then create layers - fabric at the bottom, then some bondaweb, then the Tyvek, painted side face up. Cover with some parchment paper and iron.  The Tyvek will start to shrink and break apart, which you will see through the parchment.  Up to you when you stop ironing!

The current Paper Artsy challenge is about wearable art - I created this brooch using Tyvek on felt, which has been die-cut, together with some netting, a heart charm, and some chain and pearls from a broken necklace.

I think it has a bit of a Victorian feel to it.


Autumn is in full swing now - just love those all those leaf colours against a brilliant sky. You probably can guess what is coming ... another of my haikus!

Red against sky blue
Falling folds of autumn's dress
Crushed and forgotten


Wednesday, 26 August 2015

Going round in crazy circles!

Firstly can I welcome new followers, and also say thank you for all the comments I receive - I love reading them and they are truly appreciated.

This week's Craft Barn challenge is about sprays, and the current Paper Artsy challenge is all about circles ...

I'm still into my Crazy bird stamps, so I sprayed a piece of card with some Dylusions sprays, stamped a load of  the birds, cut them out, and added another layer of eyes and beaks - some of those dies are soooo tiny, I keep dropping them in the waste bin and then spend ages fishing them out!

The background is Brushos blown around with my Color Spritzer, the tool that you can attach pens to, to get an airbrushed effect.  Mine is made by RenArt and I've had it for years, but I think Tim Holtz does one too. Anyway, I don't use it with pens, but it is great for blowing paint around!

I then cut a circle from a piece of sheet music to create a circular swing, and added some words from a Paper Artsy stamp set.


Maybe it is time to say happiness is singing in the rain - as we are getting rather a lot of the wet stuff!

Saturday, 1 August 2015

Keep it simple ...

The latest Paper Artsy challenge is all about flowers, and this week's Craft Barn challenge is "clean and simple".

I love flowers, but I am not naturally clean and simple.

I had already stamped and white embossed some Paper Artsy flowers onto Brusho'd watercolour paper, so I tried to be a bit minimalist!  I added some dots of glitter glue into the flower centres, but they don't really show in the photo.

Here is the result.


Happy August!


Saturday, 25 July 2015

Exhibition time!

The current Paper Artsy challenge is all about time.

This is an experimental small canvas, using disassembled watches.  The first clock face had a couple of cracks in it and I managed to chip away the surface to reveal a copper surface.  I love all the teeny tiny screws and other bits.


This week I went to the Royal Academy of Arts Summer Exhibition, which I thought was fabulous this year. Over a thousand exhibits - this is such a amazing show for inspiration with so many diverse artworks. Here are some of my favourites.

In the courtyard - this stunning metal construction - The Dappled Light of the Sun - by Conrad Shawcross.  In weathering steel, consisting of triangles.


Main staircase - Zobop by Jim Lambe - made from vinyl tape.

This is fun - OK going up, but felt quite precarious coming down!


Babel London (after Bruegel), transparency on LED lightbox by Emily Allchurch

Fabulous composite photograph, the detail is amazing.


Asylum, copper wire, medical plasters, pigment, feathers and silk, by Cathy de Monchaux

I first saw this artist's 3D work at last year's exhibition - stunning.


Mahe, acrylic painting, by Angela Braven

I am drawn to the vibrant colours and detail, this is a large canvas.


And finally an awe-inspiring work by Tom Phillips.  In 1966 he wanted to find an old book for threepence and alter every page with various techniques to create an entirely new work.  The book he chanced upon was A Human Document (1892) by W H Mallock.

He decided to call his treatment A Humument, a contraction of the original title.  The first reworking was printed privately in 1973.  Almost 50 years later he continues to revise and develop it.

This is page 303.  Enlarge the photo to read the words.

I fell in love with this work, there are over 100 pages showing in the exhibition.

To find out more go here.


The Summer Exhibition is on until 16 August - go if you can.

Happy weekend!


Monday, 22 June 2015

Little fish with plum blossom ...

... sounds like I've been busy in the kitchen, but fear not -

It was my turn to issue the challenge to the Fearless Four, and as I love poetry I provided two poems to provide inspiration.

The first is by D H Lawrence called Little Fish
The tiny fish enjoy themselves
in the sea.
Quick little splinters of life,
their little lives are fun to them
in the sea.

And the other is a Haiku by Matsuo Basho
Suddenly the sun rose,
To the scent of the plum-blossoms,
Along the mountain path.

I decided to use the first one as inspiration, and found a box canvas in my store cupboard (yes, I am trying to use up stuff before I buy more!).

I prepared the canvas before we met, to save drying time.  I used Ryn's Gingko stencil with modelling paste, and also used the paste to create some sea grass, with added tiny beads.

Several layers of paint later -

I don't have any fish stamps, so made my own with funky foam backed with pieces of acetate packaging.

You can see the stamps at the side here.


I also stamped the fish around the edge of the canvas - here is a close-up.


Next, I cut some fish from cardboard, and painted them separately.  These are very exotic fish, never seen before!


The end result ...


I'm entering this into the current Craft Stamper challenge, all about texture, but entries also have to include some stamping.  Hope my hand made stamps qualify!

The latest Paper Artsy challenge is all about stencils, so that one too!

And another entry for Ryn's monthly challenge!

Now, what did the other three get up to ...

Monica went for the Haiku about plum blossoms, and did two small canvases to be hung together -


Lin did a fishy one -


And Linda also went for fish -


A good time (and lunch!) was had by all ...

Monday, 1 June 2015

What if you could bottle time?

A few weeks back I bought some Powertex fabric hardener and 3D flex powder, which together make a thick textured paste to create 3D paintings and sculptures. I decided to wait until after the craft room make over before I tried them.

I found a piece of board to use, and put equal parts of the liquid and powder straight onto it, then mixed with a credit card.  It mixed quickly to become a very heavy paste, which I spread around in a bit of a pattern.

I left to dry for a couple of days.  Now, whereas some pastes I use are quite easily dented, this dried rock hard.

The pattern I had created brought to mind some kind of explosion ...


I then made a mistake. I sprayed it with some Adirondack colour wash sprays, with the intention of sealing it before applying some acrylic paint. But the matt medium didn't seal the sprayed colour and the acrylic paint just became muddy - not sure what I did wrong - maybe someone could enlighten me!

Anyway, I ended up painting over the majority of the sprayed colour. I then added some gilding wax.


As I get older (and I'm sure this happens to us all), time seems to pass extremely fast, and so I've imagined what it would be like to buy time off the shelf, say, in a bottle ...

I've used some watch parts and die-cut a bottle and stopper.  This is my interpretation of bottled time; but looking at it the next day, I saw a galaxy and planets! (Same thing really I suppose!)


The current Paper Artsy challenge is about bottles ...

Happiness would be not having to iron my face when I get up in the morning!

Friday, 22 May 2015

Are you a logophile?

logophile (noun) - a lover of words

I'm just in time for the latest Paper Artsy challenge, which is all about words.  I've recently come across "bleeding art tissue" - Eileen Godwin has done a video about it here.

I'm using watercolour card, and I cut some hexagons out of the tissue paper, then laid it on the card and brushed some water over the top.  You need to wait a few minutes, then remove the tissue, and the colour remains. Added a few spatters too!

I've also used my all time favourite Paper Artsy quote stamp which is by Artistotle. This stamp is quite old now, but has had a lot of use over the years.

The dragonfly is a recently bought Sizzix Bigz die, which comes with a texture fade embossing folder.  I cut it from a piece of Dylusions sprayed card and used some gilding waxes too.


Happy Bank Holiday weekend!

Saturday, 2 May 2015

Spray time!

My craft room is going to be out of action for a couple of weeks, as I'm having it decorated, but first I have to empty it!  Slowly going through everything; being a little bit ruthless and chucking stuff out - which really goes against my nature and "that could come in handy for a future project" thought process!

Anyway, before I packed up particular items, I needed to make a card for a friend's birthday, and to save a bit of time I was going to used some pieces of card I had already sprayed with Dylusions.

Co-incidently the current Paper Artsy challenge is all about sprays ..... so here is the card.

I prepared a background by sponging white acrylic paint through a stencil to act as a resist, then used some Prima sprays to give a mica sparkle (which doesn't show on the photo!).

I then stamped and die-cut some flowers with the Dylusions sprayed card, using some newly acquired Heartfelt Creations stamps and matching dies (this is the daisy one).  I don't usually like using stamps with matching dies, as I seem to have problems lining them up, but a friend persuaded me these are different.  And they are!  No problem lining the dies up with the stamped images, so I'm a convert now!


Back to my sorting and packing now, and to avoid withdrawal symptoms I have put a few bits on my kitchen table (including my Brushos!), so that if I feel the urge to make something I can.

Happiness is shortly going to be a new craft room (I hope!).
Happy Maytime.

Thursday, 16 April 2015

Book of secrets ...

I'm rather behind with writing some posts, including this one!  The Fearless Four got together recently, and we started off with an MDF book which has a drawer hidden in the spine.


I also had some large MDF cogs, so decided to create a steampunkish look.


I gave it several layers of different Fresco blue paints, and for the spine I used card cut into sections, embossed, and painted the same way; you can just see the card top left.

The babywipe I used to apply the paint turned out great too! (also seen on the left here)


Finally, I added some little bits and pieces, dry brushed some copper paint, and added a touch of gilding wax.  The spine drawer is painted copper and I've added the pieces of embossed card.


A good place to hide some treasures - and with that hidden niche I'm including it in the latest Paper Artsy challenge.

And what did the rest of  the Fearless Four create .....


Lin also went for a bit of steampunk - her mechanism is more complex than mine!  Love that strong blue background.


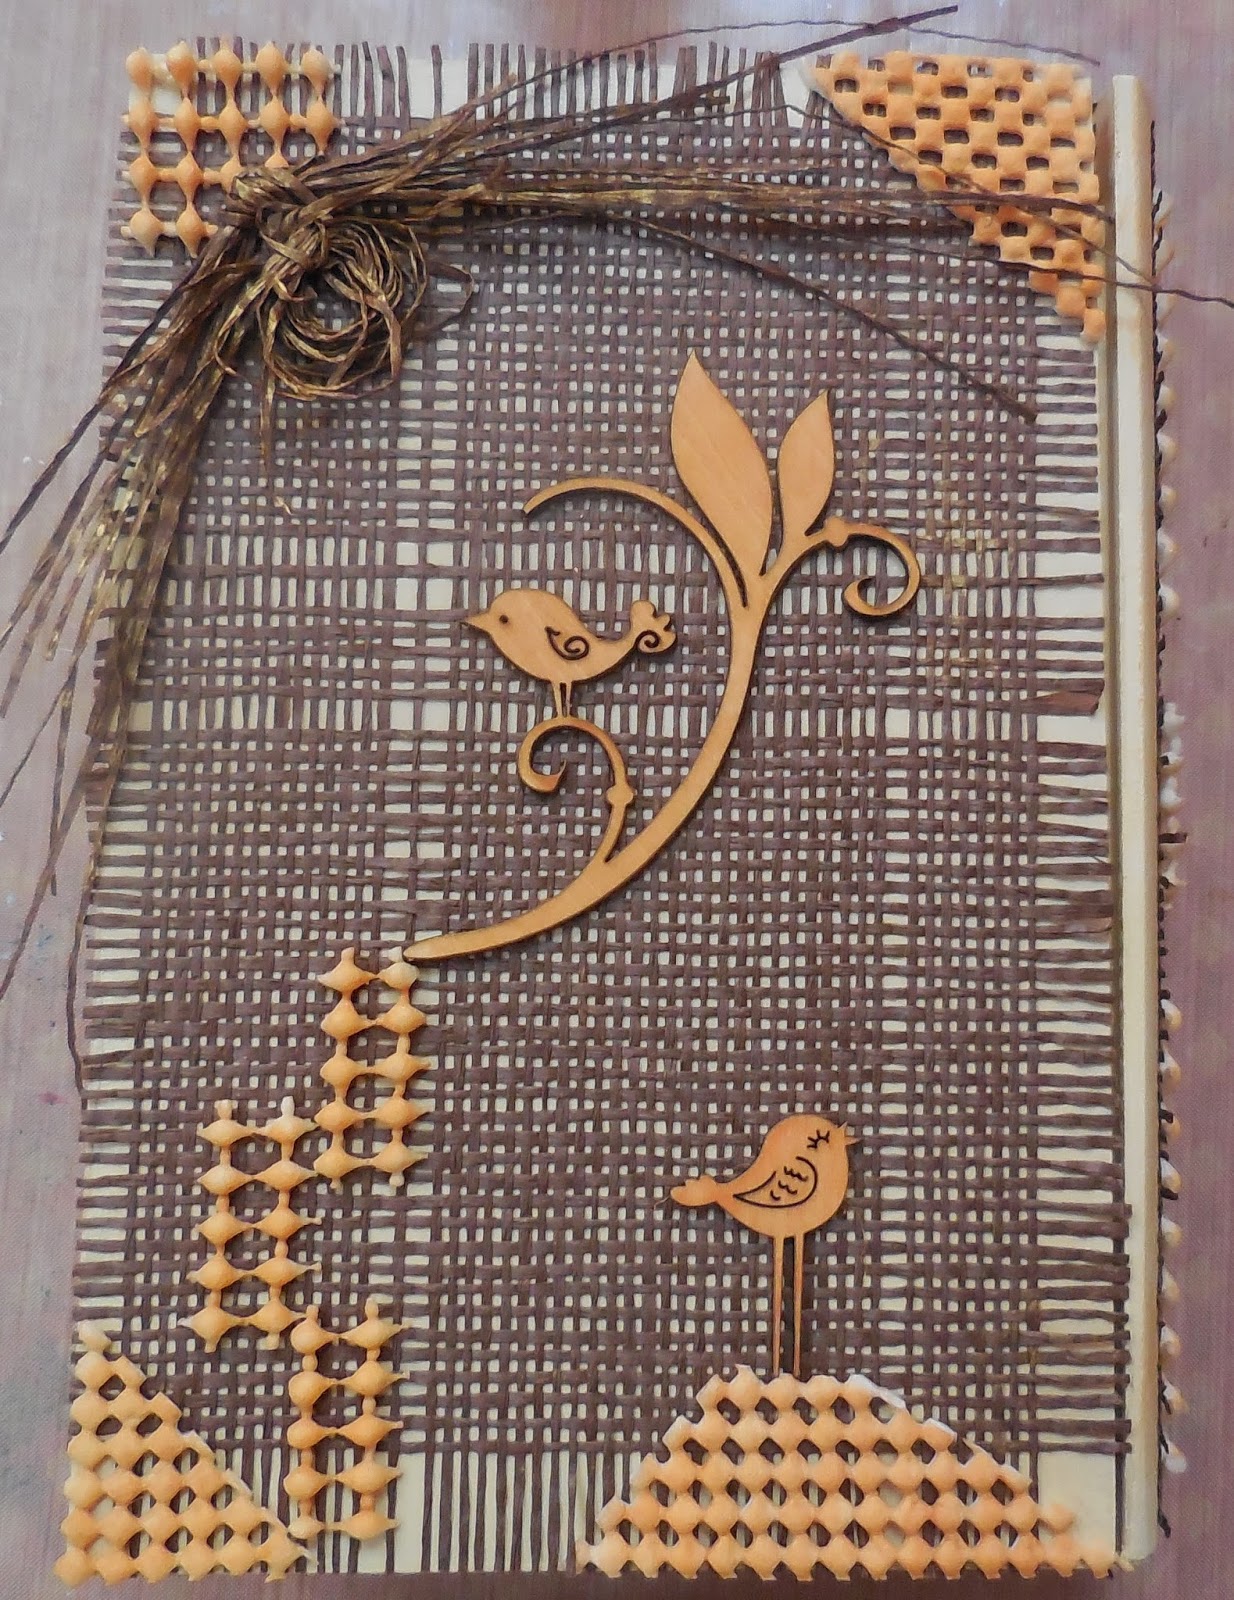
Monica went for a natural look with lots of texture. Great hessian background.


Linda used texture paste and produced a very clean summery look - fabulous.


Our next get together is in a couple of week's time, when one of us has issued a challenge .....

Monday, 30 March 2015

True grit!

The current Paper Artsy challenge is to use texture paste - Grunge Paste, or any other like-minded stuff.

This was an experiment.  I like the look of stencil bumping, which I first came across on the Paper Artsy blog some time ago. There is a You Tube video here.

I wanted to see what this technique would look like with texture paste. I used a granular one which is rather gritty, a bit like fine sand, as I wanted it to look really textured!

Decided to try it on the lid of an MDF box.  I painted the whole box first, then chose a stencil with a strong image - this is one of my favourites.  Used a light blue paint through the stencil first, and when dry, slightly bumped the stencil to the left and down a bit.  Then put through the paste, which I coloured first.


I'm pleased with how this has turned out.

So, add a bit of grit to your project!

Monday, 2 March 2015

Small is beautiful!

I'm currently working on project demos for the Ashtead Club, one of which is to create a mini canvas. I have to bear in mind that our evening sessions are only a couple of hours, and I also wanted to try and keep away from brushes, and show that you don't have to be an artist to create a fun little canvas.

And it is also perfect for the current Paper Artsy challenge which is miniature art!


In the end I did use a tiny brush (briefly!), but I mainly used a credit card, plastic palette knife (or coffee stirrer), and the eraser end of a pencil.


Using Fresco paints, I first did the background, using three colours, and made some marks for the basic layout.


I then used the pencil eraser and credit card to create some stalks and flowers, doing alternate layers of stalks then flowers, more stalks, more flowers, and so on, using a heat gun to speed up drying time between layers.

The tiny brush made all the small dots, and the Van Gogh sky created with more paint, a baby wipe and my finger.  Lastly, added a little glitter glue.


This little canvas came with its own cute easel, and the set was really cheap at £1.50.

So no excuse - happy painting!

Tuesday, 17 February 2015

Pa!nt - mix it up!

Had a splendidly painterly day with a friend, using different paints, and some metal from another off-cuts box, this time containing ..... just little bits of metal sheet!

Using a small canvas, I poured on a selection of Pebeo glass paints - blue and turquoise, plus a little  pearl - and moved it all around with a palette knife.

I poured on too much, so had to scrap some onto a piece of board. The pearl glass paint created a great effect when combined with the other two colours.

Die-cut some bits of copper, then heated it to get that colour change.

Shaped the flowers so that there was a slight dip in the middle, then added some Pebeo Prisme paint (love that stuff).


Whilst waiting for everything to dry a little, die-cut some more flowers with an aluminium base, then coloured them with alcohol inks.


Again, shaped the flowers and dropped in some Prisme and Moon paints.


This little canvas came with a wooden frame; had some trouble trying to decide what colour to paint it.  After much deliberation I went for Fresco Honeydew, which is a delicious soft colour, and the matt finish contrasts nicely with the shiny glass paints and metal.

I think this is a very apt entry for the current Paper Artsy challenge entitled "Paint" .....


Now - what else can I do with those metal bits ......?

Tuesday, 27 January 2015

Baroque shiny-ness

The latest Paper Artsy challenge is to create something using shiny stuff, which reminded me of some small faux baguette-cut gems I had been given.

I think these were used in making costume jewellery.

I also had a blank MDF box sitting forlornly on a shelf pleading for attention!


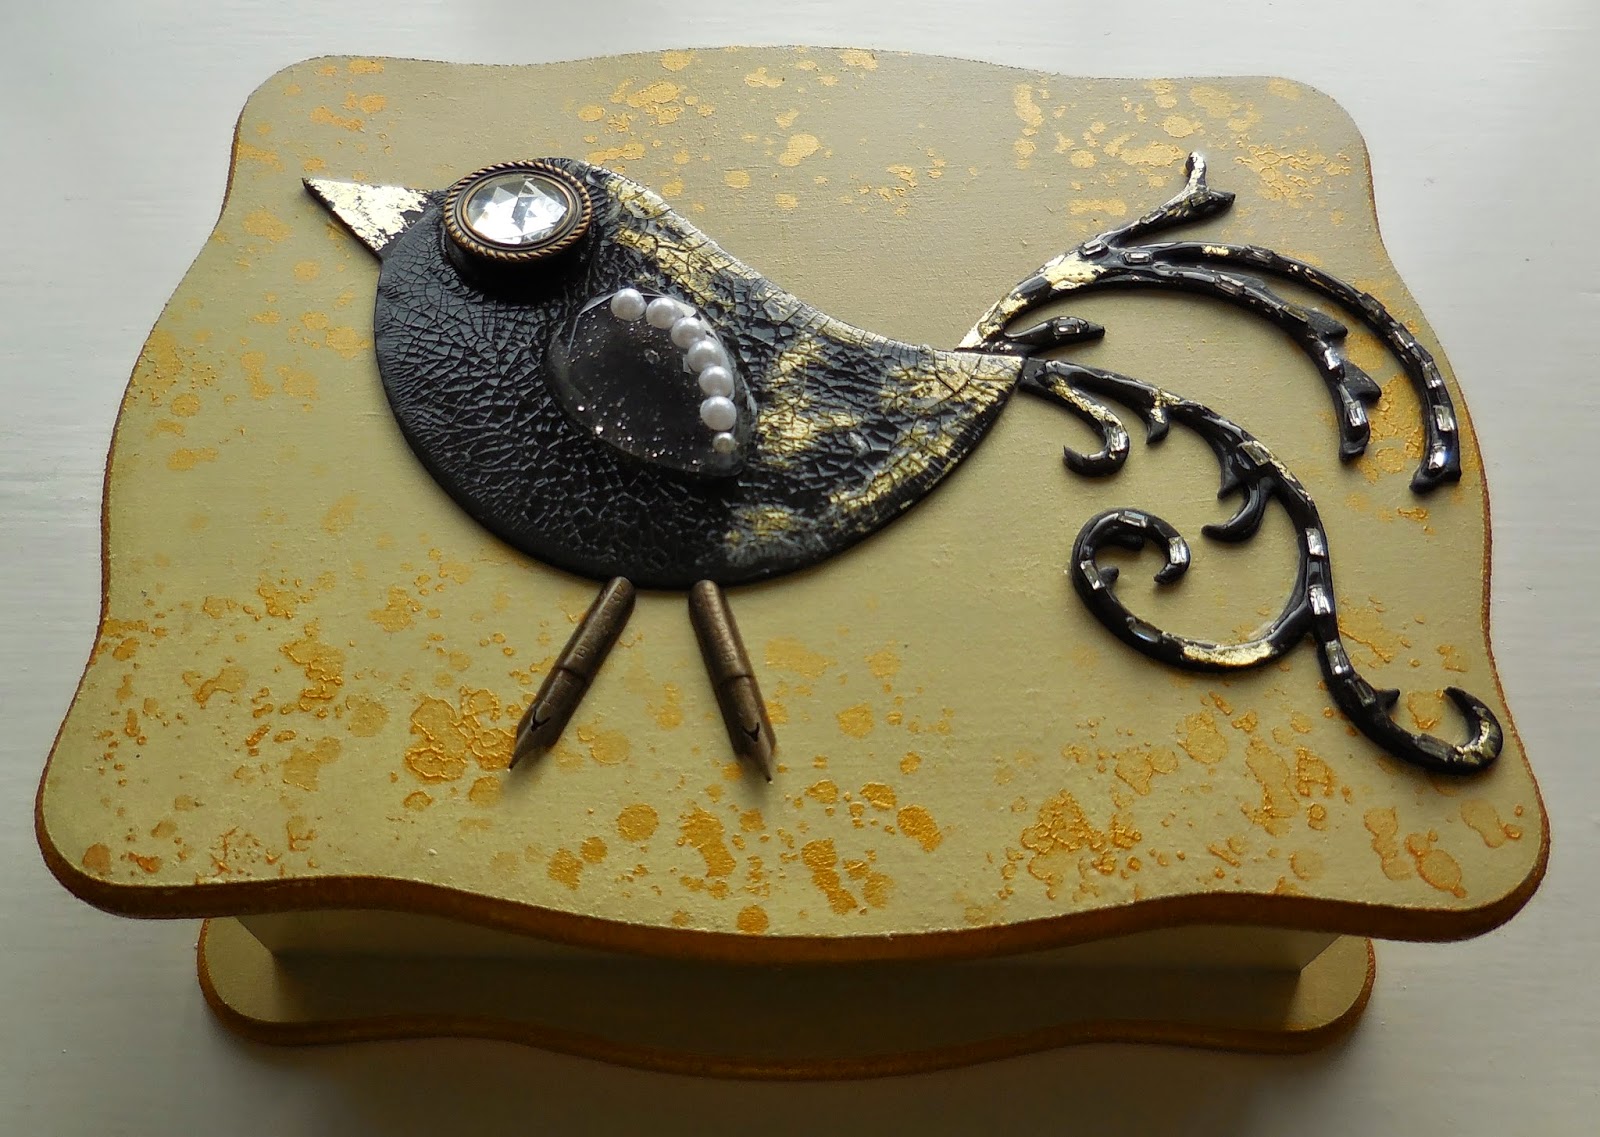
So, I decided to create the most exotic baroque bird .....

The box itself was painted with a light coloured acrylic paint, and edged with gold.  I wanted to do a controlled spatter, so used the gold paint through a stencil.

The birdy is die-cut from thick mount board, and his tail are pieces from die-cut swirls.  First painted black, I then added some gold foiling with a glue-stick.  The main body of the bird was then covered in crackle medium which added some texture, but is also shiny!

In my box of found and collected items I found a button for the eye, and a clear acrylic shape for the wing, to which I added pearls.  The baguette-cut gems were added to the tail, embedded in glossy accents.  Two pen nibs were perfect for the legs!

So, here he is -


Be outrageous - and strut your stuff!

Saturday, 10 January 2015

Feeling fragile .....

I so enjoyed doing my first challenge last year (with the Craft Barn), that I thought it would be good to do another one.  I've long been a fan of Paper Artsy stuff, and their first challenge of this year got me thinking, as I was about to start preparing materials for a special birthday project for next month.

I have always loved using different papers - book and magazine pages, sheet music, and creating my own collage papers - so .....

The first Paper Artsy challenge is to use fragile papers in a project - see here.


I started with a few pieces of paper, including some of the original Paper Artsy crackly tissue, PA Crunchy Waxed paper, and some of the rice paper I recently bought in Chinatown.


Brayered on some PA paint - Mermaid, Guacamole, Butternut and Dolly Mix, and stamped with Claret and Snowflake.  Used a couple of PA Minis for this, a JOFY one and the splatter one.


I knew I wouldn't need all of this paper for my special project - which I won't be able to share with you until after the birthday event!

So - what to do for the PA challenge ..... well - I added to the challenge and decided to make an ATC.  I've never made one before, as I seem to prefer larger projects.  I had to look up what size it should be (two and a half inches by three and a half inches), and cut some board to size.

Covered it with a piece of sheet music, used gesso to knock it back a little, then added a touch of gilding wax.

Die-cut some of the painted tissue and unpainted wax paper, found a little wooden heart and word stamp, and ..... here is my first ATC!


Working with such a small area really focuses the mind - and could probably become addictive!

PS:  Paper Artsy actually spurred me on to start writing this blog, see my first post here, and it is my blog's 2nd birthday this month!