We shall not cease from exploration
And the end of all our exploring
Will be to arrive where we started
And know the place for the first time.
"Little Gidding"
T S Eliot
Showing posts with label Pouring. Show all posts

Wednesday, 1 May 2019

A little pour goes a long way!

Spending a lot of time on my house hunt/move, so little time for arty things, but the Fearless Four got together recently for a little acrylic pouring - always fun and a good way to use up old acrylic paint. I'm slowing reducing my stash of craft paints which I don't use now.

Here is what I produced - I added a bit of glitter in the first and last one.


I may frame the middle one, as that is my favourite.

And what did the others get up to ...
Lin's creations

Monica's creations

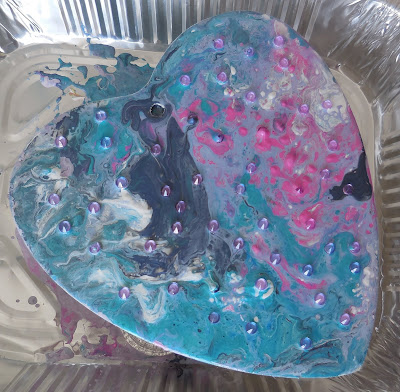
Linda went for a heart-shaped base and added a little bling!

I've decided to have a go at using oil paints - I need something to distract me from property matters!

I found this recently - and it is so true (for me anyway!).


Happy bank holiday weekend!

Wednesday, 18 July 2018

Too hot to tango!

It has been much too hot to do much painting of late, as my workroom is upstairs at the back of the house where the sun is full on! This summer so reminds me of the one in 1976 - I didn't like that one either!

Anyway, I did try pouring acrylic paint onto glass, with some success.

I found some glass items (leftover from the time I did glass painting), and decided to use a flat coaster/candle stand, 2 tealight holders and 2 votive holders.

I upended everything and did 3 dirty pours and one pouring the colours separately. I tried to think about what the colours would look like from the "right" side!


Both votive holders were a disaster (dirty pours), and I hadn't considered what they would look like right way up with candles in them!


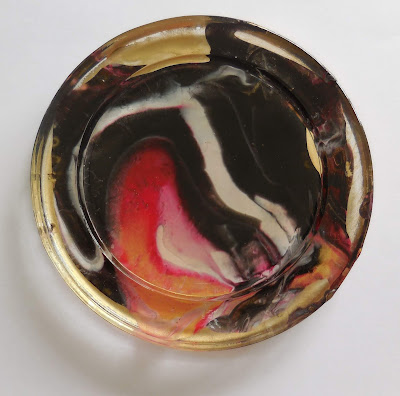
But the flat coaster turned out OK. This was another dirty pour, and I used too much black. I varnished the underside.

I've put a hot mug of tea on it, and the paint wasn't affected.


The 2 tealight holders turned out OK too, but the one where I poured the colours separately was better.

Some of the paint ran onto the underside of the lip. I have burned a tealight and that was fine too.

Again I varnished over the paint.


What have I learned? The paint needs to be really really fluid, with careful consideration of the colour combinations, which are better poured separately; particularly for these small items.  I will have another go, as I've still got some glass things.

Another day trip last week, this time to Knebworth House in Hertfordshire; home to the Lytton family since 1490. Fascinating hearing about the family history spanning so many centuries.

Knebworth is well known for its festivals and concerts, the biggest music event in British history was Robbie Williams Live at Knebworth in 2003.


We weren't allowed to take any photos inside, but the gardens were lovely, and scattered throughout were some fabulous sculptures.

I was rather taken with this one, which seems to have been carved out of a dead tree.


Knebworth has 28 acres of park and gardens.


These chaps were hidden within a clipped yew walk!


Great day out, apart from a bit of a nightmare journey home as the M25 was closed, so took nearly twice as long as it should!

Going to the annual RA Summer Exhibition next week (if it is not too hot!), so looking forward to that.


Saturday, 26 May 2018

"Which of all my important nothings shall I tell you first?"

Written by Jane Austin to her sister (15 June 1808)

I'm in that usual place of too many projects and nothing finished! So here are some further acrylic pourings, when I tried adding some of the Pebeo fantasy paints - Prisme and Moon. I didn't add enough, but I do think the combination will work if I'm more adventurous with the quantities!

This was mainly an acrylic pour with some green Moon and turquoise Prisme.


Here's a close up.

The Pebeo paints don't sink below the acrylic, but to get the special effects I should have added more of the Pebeo paint.


I was pleased with this pour, as I got lots of cells without applying any heat. Think this will go on the front of a notebook!


Lastly, this was pouring colours separately. Another notebook cover ...?


I recently visited the village of Chawton in Hampshire, which was home to Jane Austen. Jane Austen's House is now a museum, which I could quite happily live in!

This 17th century house in where Jane Austen spent the last eight years of her life. The cottage was part of the Chawton Estate which her brother Edward inherited. Edward offered his mother and sisters this cottage as their home.


We visited in April when the garden was just coming to life. Very pretty.


We then went to Chawton House which was where her brother lived.

Jane refers to this as the "Great House".


"Ah! There is nothing like staying at home, for real comfort."
Jane Austen

Tuesday, 15 May 2018

Strut your stuff ...

Took part in a fabulous workshop on Sunday. This is quite a large canvas, 24 inches by 12 inches.

We used acrylic paint, and also did some very mini pours on the peacock tail feathers, so a little bit random. There is also a little crackle paste on the background, for some texture. The background is very subtle, with just a hint of colour.

Came home tired, paint spattered, and very happy.


Thursday, 22 March 2018

Did you ever stop to think ...

... and forget to start again?
(A A Milne - Winnie the Pooh)

The final project on my art course was to create an abstract and we had to find our own inspiration.

Which for me involved a lot of thinking!

Abstracts are quite difficult as they come from the imagination, but there has to be a starting point. For my inspiration I found a photo of a autumn day with the sun coming through autumnal foliage; I just loved the colours. Then - more thinking ...

I decided to experiment by creating some poured acrylic skins. Which means doing a normal pour, but onto a non-stick surface. I used a silicon oven liner.


I let them dry and cure for about 2 weeks before I peeled them off, and stored them between sheets of wax paper.

I'm using a 12 x 12 stretched canvas, and I drew a design (for placement) before using dilute acrylic paint for the background.

I'm quite impatient whilst waiting for paint to dry, so I have learned that putting more acrylic over wet acrylic takes the first layer off. I used this to my advantage by creating fast moving drips over over the wet first layer. I made both horizontal and vertical drips.


Next I painted the circle in gold and added the horizontal and vertical lines. Later I knocked back the lines as they were too strong.


I carefully cut the skins (with scissors). I do like geometric shapes, hence triangles! Finally, I added some mica pieces (Golden's Gold Mica Flakes) which are held in a transparent medium.


I've called this "Summer's Last Breath", and it will probably go into my Etsy shop.

Hope we have seen the last of the bitter cold wind and freezing temperatures, and that summer is not far away!

Tuesday, 13 March 2018

Pouring happiness!

I've still got several projects that need finishing; being ill for most of February has set me back somewhat! Anyway, fully recovered now, and the sun is shining so feeling very Spring-like.

Still experimenting with pouring acrylics. It looks simple but it isn't - here's the science bit - some pigments are heavier than others, which should dictate the order of pour. But that is only if you know the specific gravity of the paints! I think I'll just continue to experiment and let serendipity prevail!

Here are some more ...

I used an old canvas board for this one, and I can still see the texture paste underneath! If you look carefully you can see a bird in the bottom black section!

This is a horizontal pour, with a black pour either side.


This tiny canvas has the excess from the previous pour above. I just scooped up the paint with a palette knife and dropped it onto the canvas, letting it do its own thing!


This pour is on a white glazed tile.

Sometimes there are air bubbles in a pour, and I think that heat can get rid of them. Musr remember that next time!


I've been using mountboard for experimental pours too, and I thought that it would be a pity not to use the successful ones  - so I've put some on the front of notebooks! This one, and a couple of others are in my Etsy shop (here), or there is a link on the sidebar.


Now, I must - must - must - finish some of the projects that are littering my craft room!

Thursday, 1 March 2018

A different B side ...

I am very pleased February is over, as I was ill for most of it. Today is the first day of the meteorlogical Spring, but it is freezing with quite a bit of snow around, so not too spring-like!

Still having fun playing with pouring acrylics. This time the Fearless Four got together to do an LP pour. That is, take one old vinyl LP, cover the hole with a sticky label then do a slow pour!

What a mess!

But such fun ...


Whilst they were still wet and dripping I took these photos.

Linda's creation.


Monica's


Lin's


They took an age to dry. Here's mine -


I'm going to varnish it and then ... not sure - could make it into a clock, or just mount it onto a canvas; haven't made up my mind yet.

We all used the left over paint to do more pours on whatever was to hand, I did a small canvas -


Happy March madness!


Saturday, 27 January 2018

Infinite possibilities ...

I've been juggling too many projects recently! My floor is covered in "project trays".  These trays hold all the materials for each project so that I can find things easily. But it is not so good when you have to negotiate an obstacle course to get to my work table!

Anyway, following on from my first experience of acrylic pouring (for more detail see here), I decided to have another go with a pour and a swipe!

I've done these on pieces of mount board, about 8 inches by 5 inches.

This is a cup pour, and I used chalk paints and an interference paint too. Both worked, but it is impossible to photograph the effect of the interference paint which gives a lovely glow.


Next I tried a swipe using an old credit card, and the swipe colour is black. I included gold too.


Fascinating to watch the cells develop, and I didn't use any heat.

I had one failure, but only due to the fact I was doing it on a small piece of mount board. This should have been another swipe using a damp kitchen paper towel. I had to hold the towel with two hands, and with the board being so lightweight ... well the towel just swiped the board across the table!

So I dripped more paint on and took to blowing through a straw to see what happened ... quite interesting!


There are plenty of videos on You Tube about acrylic pouring. I prefer a pour to a swipe, and I do like the effects created. I'm now thinking about incorporating some in a painting.

Lovely to see some snowdrops and winter cyclamens; the days are getting longer, and I felt the warmth in the sun yesterday - happy days.


Saturday, 23 December 2017

No snow, but it is pouring!

Last weekend I did another Powertex workshop - 5 hours of getting messy and having fun, this time using Powertex in a pouring technique.

The box canvas used is 16 inches square. I started by creating the accumulation of flotsam by using shells, bits of wood, and other detritus. This was stuck to the canvas using ivory Powertex. When dry, I sprayed some Bister, followed by dry brushing with metallic colours.

While this was drying I mixed up my chosen colours - I used blue Powertex, purple acrylic paint and green Powertex (though the green completely disappeared). The colours were mixed (in separate cups) with Floetrol (this makes the Powertex/acrylic paint more fluid), and a few drops of silicone oil. I also had a cup of white Powertex also mixed with Floetrol (but no oil).

Using a clean cup, I poured in some white followed by the other colours in a random order.

Holding the full cup of paint, I placed the canvas on top and then flipped both cup and canvas over. When released the paint moves pretty fast, and I guided it where I wanted it by tilting the canvas. The addition of the oil creates the cells.

Finally I added some more white Powertex to give an impression of sea foam.


I had such fun with this, probably because it is unpredictable! Anyway, there is lots of info on You Tube about acrylic pouring.

It is Christmas Eve eve, and we won't be getting any snow, so ...


Happy Christmas everyone, and wishing you all a peaceful 2018.