We shall not cease from exploration
And the end of all our exploring
Will be to arrive where we started
And know the place for the first time.
"Little Gidding"
T S Eliot

Wednesday 29 January 2014

Enjoying the SILENCE .....

Time for the second Craft Barn Quotes and Lyrics challenge.  The two words are SILENCE and DAZZLE.

I've chosen a Confucius quote -

If what one has to say is not better than silence,
then one should keep silent.

I've used thick cartridge paper and sticking to my 10 x 8 format.  I found an A4 sketch book I can stick these challenges into, just need to decorate the cover!

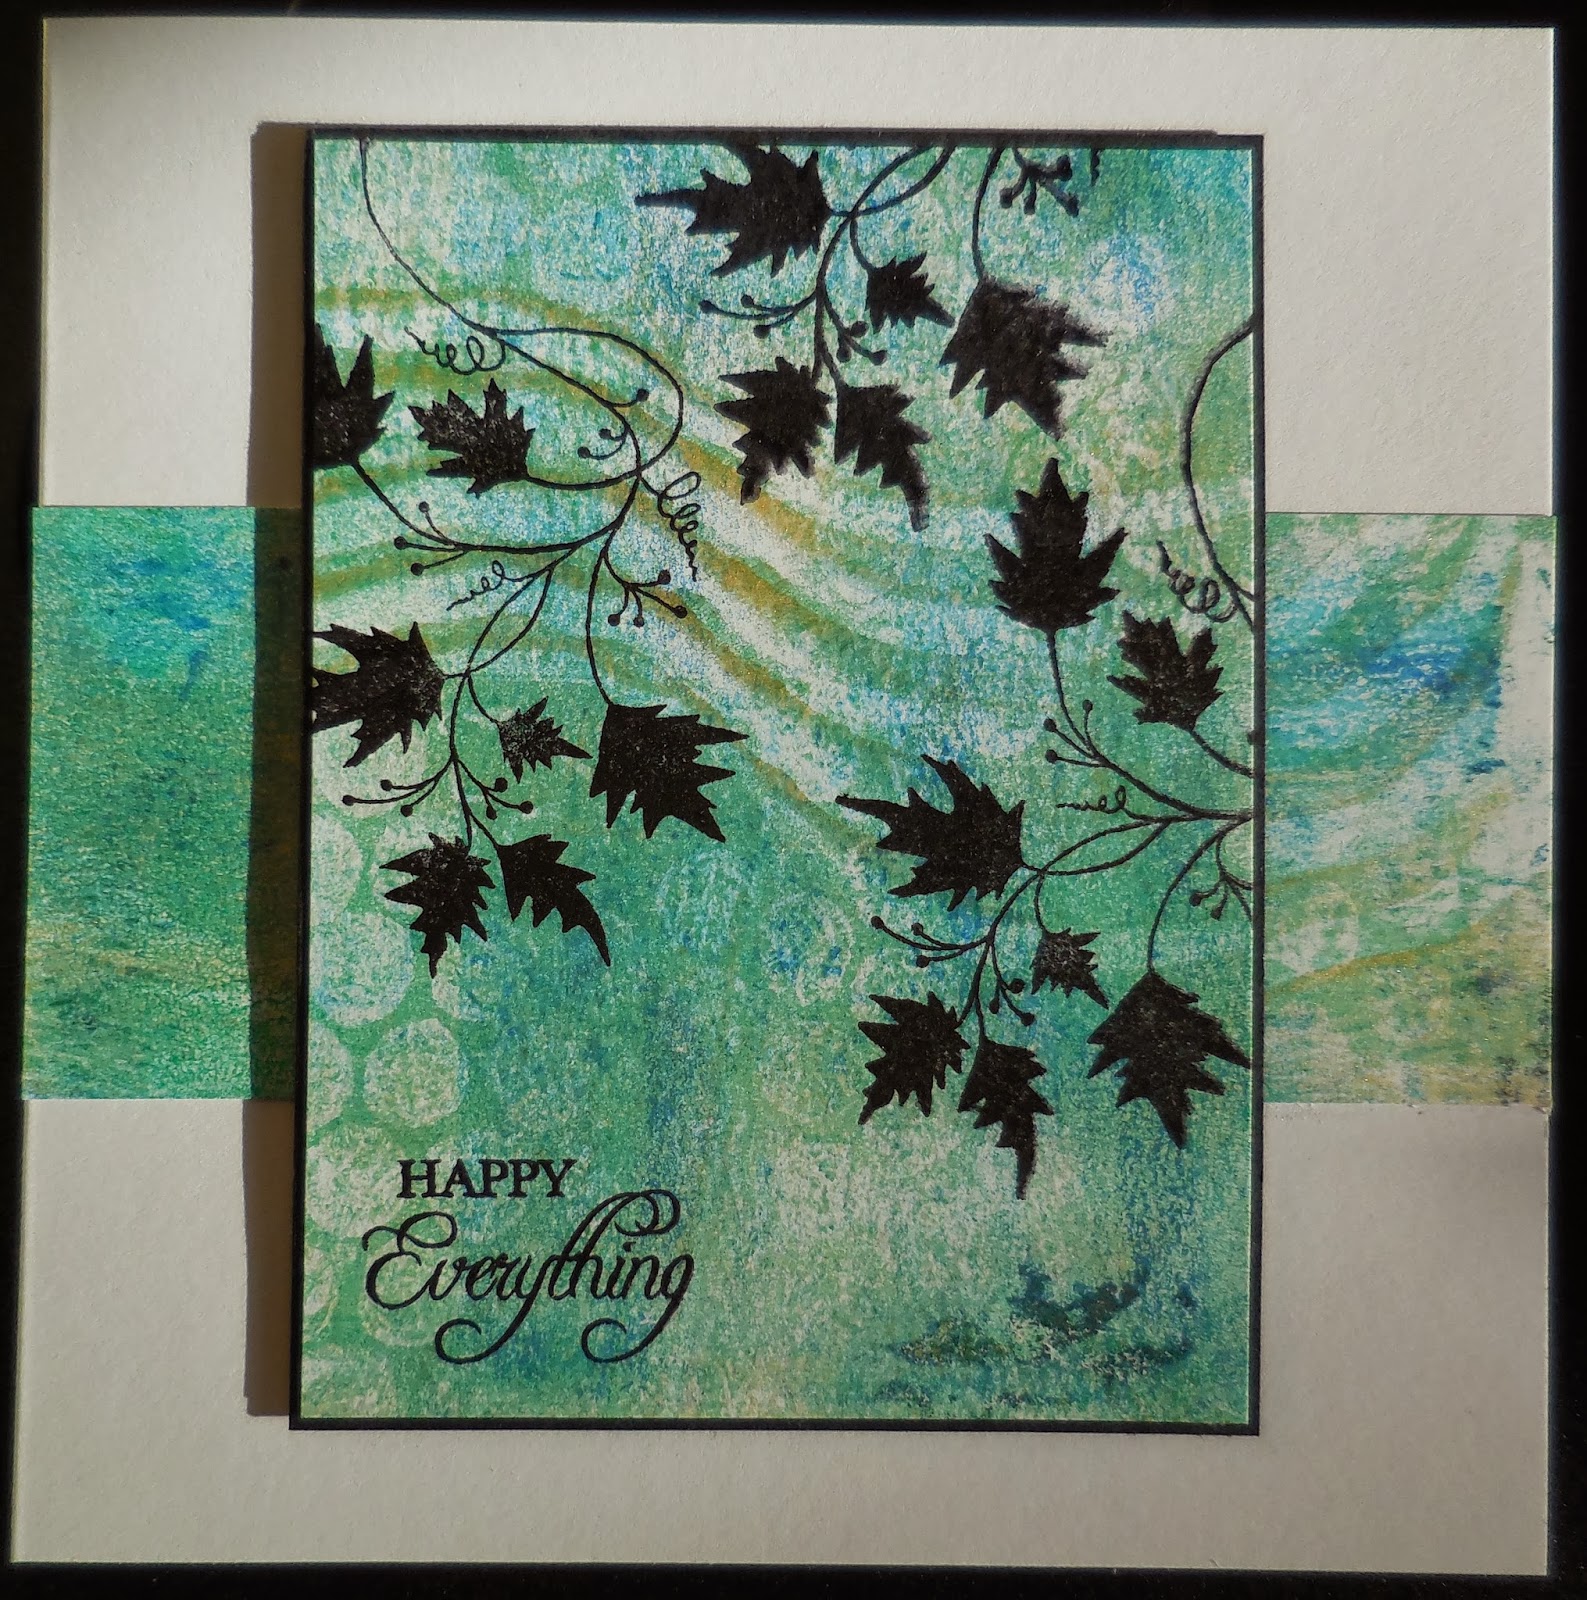
Spritzed some Tattered Angels (the ones that were working!), followed by some Dylusions through a stencil. I flipped the stencil over and used it as a stamp on other parts of the paper.

I've not had much practice at handwriting words, but found this format is quite easy and pleasing to do for beginners! Stamped leaves (from a Dylusions stamp set) - some in Spiced Marmalade Distress Ink, and some in black Stazon, which I clear embossed.  Bit of a disaster, I was going to use black Archival Ink but dropped the pad, face down, into my box of clear embossing powder ..... I did try and wipe off the powder, but it is the fine detail stuff.  I now have a lovely gritty ink pad - ho hum! it may come in useful!

Anyway, back to the project - I decided to use glass paints for the leaves, as I wanted a transparent colour. The glass paint did sink into the card, so I then covered some of the leaves with Glossy Accents.  The glossiness has not come out in the photo.

The moth (stamp is Designs by Ryn) was stamped onto white canvas - as I wanted a brighter image - and painted with the same glass paints, then cut out.


Monday 27 January 2014

New Year Clubbing!

First 2014 get together for the Ashtead Club (blog link on sidebar under favourite sites) on Wednesday. Seems ages since the last one - but it has been 2 months!

A gentle creative start is needed - and I'm going to be demo-ing colour blocking with scrap card and paper, together with white silhouettes.

Using bits of left over card, covering the whole card - either in tonal horizontal stripes, or .....


Vertically using a mix of plain and pattern card and paper.


Or cut three circles from different card/paper, slice them up when stacked together, so when the pieces are mixed they all fit.


Great way to use up bits of card and paper, and a quick way to make a last minute card!

Friday 24 January 2014

More Gelli-licious-ness!

A friend got a Gelli plate for Christmas, so we spent a happy day covering everything in paint!

Gone to lunch!  So time to take the occasional Craftroom Work in Progress Snapshot (CWIPS) .....

You can see the wood block stamps, (bottom left) which I tried using, but they were not really successful.


But rubber stamps work really well - used a large corner stamp here.

Stamps remove the paint from the plate, so I needed to think about at what point to use a stamp during making a print.


Also, I had those reverse text stamps by Tim Holtz (Stampers Anonymous), which were still unused in their packaging (they seemed like a good idea at the time).

They work well with the Gelli plate, this print is not finished, but you can see the text is the right way round!


Using black card is fabulous.

This one is on black glossy card using Pebeo Studio Acrylics Iridescent paint, with a quite intricate stencil.  The glossy card holds onto the paint when taking the stencil off, creating a good textured effect.  Pity photos can't show the iridescent shimmer!


Black matt card, using the same paints.


Using the iridescent paints on white card.


All this Gelli-ing creates a conundrum. I'm sure I'm not alone in this - I'm creating a lot (and I mean a lot!) of prints!  Yes, I'm using them on cards, and I have an idea to use them on canvas (die-cut), and they make great journal backgrounds, but the rate of use is still not going to keep up with production!

Perhaps we should form Gelli Anonymous - to find ways to use these prints, otherwise they are going to take over the world!

Monday 20 January 2014

Happy Blogging Birthday!

It was one year ago today that I did my first blog post here, and I wasn't sure how it would develop, but I'm still here a year later, so something must be going right!

Still not worked out some of the technical aspects, which is probably why this blog has not had any design changes, but I've not got bored with the design yet, so I'll stick with it for a bit longer.

I still get a thrill when someone likes what I do, so thank you for all your comments over the past year, they mean a lot to me.

I've discovered a lot more crafty blogs too, which I love reading and seeing what everyone is getting up to - you provide a lot of places to go when inspiration fails!  I also found Pinterest, which is a bit addictive, so I tend to ration myself, but that is a world of inspiration too.

I've recently been working on this year's projects for the craft group I run. This is one project - a folded triangle star card, made from a 12 x 12 sheet of card.  Found the instructions on Pinterest, which are here. Something that can be decorated countless ways, but for this project I've used patterned papers.

This card is also for all of you who read or follow my blog; thank you again for all your kind comments.  I could say you are all stars, but methinks that would be a little bit too banal!!


Happy blogging - I can recommend it!

Thursday 16 January 2014

UP for a challenge!

I have collected quotations and sayings for more years that I care to remember - so - when I saw this year's challenge on the Craft Barn blog - it's all about Quotes and Lyrics - I couldn't resist!

The Craft Barn is my "local" store (about 35 minutes away), and a good place to go to get a craft fix!!!

Now, I've never participated in any challenges before (apart from the ones set by the Ashtead Craft Club I belong to), so I don't know whether I'll last the course, but this is so me, that I've got to have a go.

Every couple of weeks 2 words will be provided - to be used individually or together, to create an artwork, in whatever form is desired!

The first 2 words are SMILE and UP.  I did have a quote using both words, but decided to use one by Lord Byron.

The angels were all singing out of tune,
And hoarse with having little else to do,
Excepting to wind up the sun and moon
Or curb a runaway young star or two.

I'm also going to do individual pieces, so that I can use whatever substrate I fancy - be it watercolour paper, Yupo paper, board, etc.  Only the size will remain consistent - 10" x 8" - then if I want to combine them all together in some form of book, I'll be able too.

So, here is my first challenge entry, on 300gsm white card - spritzed background using Perfect Pearls and Dylusions, with some stencilled stars (using sequin waste).

Angel wings are cut from a Sizzix Bigz die - using silver mirri board and one of my Gelli prints; the sheet music one.  The face is from my stash of paper clay faces I made a few months ago.


Now I've got to get this onto the Craft Barn blog .....

Saturday 11 January 2014

Had to use those Gelli prints .....

..... otherwise they would have been consigned to the "later" box!

Using the 6x6 Gelli Plate means the prints are great for using on cards.


Background print used a  steampunk mask.

And I got the Sizzix Bigz pocket watch die for my birthday - I love it!


Some of my first attempts at Gelli printing came out too dark, as I didn't know when to stop!  And the dark blue background here is one of them.

The image is stamped on a print made with dried left-over paint reactivated by brayering over the top.  I like the way the swirl I made can be seen on the binocular lenses - pure accident!

The  collage stamp is by DoCrafts.


These flowers (from the Chocolate Baroque steampunk floral set) have been stamped and white embossed on a print that again had little definition, but a pretty gold cast to it, which doesn't really show in the photos.

Background is a print pulled on texture acrylic paper.


Managed to stamp 5 flowers, so here are the other 2!

Gelli background is using a piece of blown wallpaper as a stamp onto the Gelli plate.


This background is a 2nd generation print, with stamped raindrops (stamp by Designs by Ryn), and the words (stamp by Sheena Douglas) stamped on another print.

Raindrops and words highlighted with a white pen.


Loved this 2nd generation print, which I cut into 2 pieces, and managed to match up the swirl lines.

Image by Lavinia Stamps.


Finally, this is one of the sheet music Gelli prints. I die-cut a circle then used a stick glue with gold foil randomly around the edge.

Die-cuts from Memory Box.


Happy January!

Sunday 5 January 2014

Boxed Greetings for a Happy New Year!

Wishing everyone a Happy New Year, and hope that 2014 is good to you.

I just had to do the second box (see previous post of 15 December), otherwise it would have been put to the back of the cupboard again for a couple more years!

This box is the same shape but slightly smaller than the first one, as the pair came one inside the other.

I had a rummage through my odds and ends stash and found this mesh-like fabric, which I used to cover most the the box.  It looks a bit like an all over crackle effect.


I also found some old Prima paper flowers, a couple of metal leaves, plus a tiny acrylic rose, a heart charm and bead caps.

Most of this ended up on the lid, but a couple of flowers are also on the front too.


I then decided to add some Kroma Crackle, but I wanted it to run a little.  I thought that the domed box lid would facilitate this.  It did - but it ran right off - this stuff is surprisingly mobile if not on a flat surface!  I tried again, this time patiently holding the lid and rocking it backwards and forwards until it slowed, then wedged the lid between lots of pot and things to keep it at a certain angle - that worked!


A coat of netrual grey acrylic paint brought it all together.

Quite a few layers of pastel paint ensued, when was then knocked back with a very watery whitewash of paint, dabbed off with a wet wipe.


Finally, a liberal dose of Treasure Gold gilding wax.

Close up of the lid.


Unusually for me, quite a pretty thing!