My favourite was using rock salt, which I have done before, but this time I used Adirondak colour washes on watercolour paper; but you could use anything, just ensure it is very wet! The more absorbent watercolour paper gave a different effect than, say, on gloss card. Some of my sprays refused to spray, so I just poured it on (after spritzing the paper with water), and scattered on rock salt. Leave to dry for a few hours, and remove salt. I love the effect, for backgrounds or die-cutting.
Next - wax crayons. Take a piece of card and parchment paper, heat the card through the parchment with an iron, then immediate start colouring with the crayons, which start to melt and blend. Keep heating and blending until happy. Initially we stamped an image with Stazon, and coloured on top, but that just turned out a complete mess. This is done in reverse, colouring with the melted crayons, and stamping on top - quite like this, but not really wow!
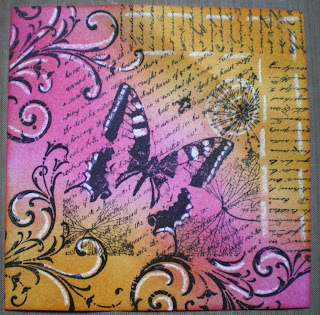
But, using the white crayon as a resist - now this is a very quick way to get highlights on a stamped image, and I'll be doing this technique again. Stamp image or create a collage, use the white crayon where you don't want any colour. Then colour with Distress Inks. Buff to give more definition to highlights. Love it! Here's two examples.
Of course, there is only one white crayon in a pack, so decided to try a candle. Now this was a very old, stumpy thing, so not a lot of control, but you get the idea.
So, I'll be adding a candle to add to my craft tools!
The lemon thing was a bit of a disappointment. Lemon juice, when heated, turns brown; so spritzed and heated, it should give an old and distressed look. Bit of a faff really, the same effect can be obtained by flicking distress ink (from the brown palette) onto the card. Here is both - and I can't tell the difference between the lemon and the distress ink.
For a quick, effective background stamp using Versamark and clear emboss. Take 4 Distress Inks - different shades of one colour, and create strips of colour using post-it notes to mask off sections. Use the lightest colour first all over the card, mask off a section where no further colour is required, take the next shade and go over remaining card; mask off another section, and repeat with next shade, and again with the darkest. Quite effective.
And a good day was had by all!!!


Hear, Hear.
ReplyDelete