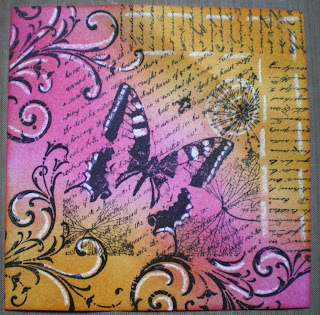
We shall not cease from exploration
And the end of all our exploring
Will be to arrive where we started
And know the place for the first time.
"Little Gidding"
T S Eliot

Saturday, 27 April 2013

Three of hearts

A different mix for the background this time, again using a canvas board.  Used up some scraps of printed paper and pages from an old book, stuck down in quite an organised way, covering the whole canvas.


Applied a few layers of paint, and used some newly bought stencils; paint through two of them, and paste through another.  Love the Andy Skinner Tornado stencil.


I wanted to make some puffed hearts using kitchen roll, which I learned from Lina McDermott at one of the Craft Barn's demo days. The kitchen roll I used had real texture, which you can still see, and being very lightweight, are perfect for adding to a canvas.  Here's a close-up.


Before I stuck the hearts on, I added some stamped images to the canvas, and scrapped a little more paint on.  Then added some flourishes to the hearts, with a little copper guilding wax to finish.


Tuesday, 23 April 2013

More things with wings!

I'm getting a bit obsessed with die-cuts on canvas, so these are my last for a bit, as I want to try other stuff.  I found 2 small canvases measuring 5" x 5", with their own wooden frames.  Started each one in 2 sessions with friends, and finished off at home.  I purposely chose similar paint colours and themes to make a pair.  The frames are slightly crackled.

A dissimulation of birds (I'm into collective nouns ....)


And a couple of birds with a guest - just the one spider, but a few would be a clutter of spiders .... not sure if they are having a conversation, or just eyeing up lunch!


If you want to see how I do it, go to the March post entitled Singing the Blues.

Friday, 19 April 2013

A flutter of butterflies .....

There are quite a few collective nouns for butterflies - rabble or swarm for instance - but I quite like a flutter of them!  So here is a flutterly few, using previously created elements.

Dobbed and mixed some Pebeo Prisme onto acetate, let dry, then die-cut.  It is quite difficult to die-cut cleanly through the thick paint and acetate using a thin metal die.

Created a couple of cards with more Pebeo butterflies - this one uses 2 Moon paints swirled together; unlike Prisme, the paint doesn't move any further from where it is placed.


This butterfly is using black Moon paint with turquoise Prisme dropped in.  The background is 9 squares created by stamping and embossing onto patterned paper, cutting into 9 squares, and reassembling them out of sequence.


Lastly, this card uses the background recently created using a white wax crayon as a resist (see posting of 11 April ).  Die-cut 2 white butterflies, and embellished them and the background with pearl dimensional paint.


Hope our summer is all aflutter with them!

Monday, 15 April 2013

Romantica

I wanted to try a few new techniques, and some recently purchased products.  Started with a box canvas this time, and covered it with printed tissue paper (the Tim Holtz one).

Used a stencil and the new Paper Artsy Grunge paste for some leaves.  This paste is quite gloopy, but very smooth - endless possibilities methinks!  Added a couple of die-cut birds too.  The piece of white paper indicates where the stamped image is going to go, as I didn't want to encroach on this area with anything dimensional.


Gave it several layers of Fresco paint.


I usually use tissue paper to get an image onto a canvas, but this time I stamped onto 1-ply of facial tissue, using the Indigo Blue stamp Elizabeth Bennett - which I love - it's a very romantic image.  I then fixed it to the canvas using melted beeswax.  Never used beeswax before.  Quite disconcerting - as soon as you brush it on it solidifies, so all I had was white blobs, but using a heat gun I re-melted it and pushed it around.  I then dropped some micro-beads into the molten wax, for texture.

Finished with a little more paint here and there, and some guilding wax.  Here are a couple of close-ups.  To ensure the face remained white, I put a little white paint on the canvas first.


Love this cute little bird - a Memory Box die.

And the finished canvas.


Quite pleased with it, although I don't think the stamped image covers as much of the canvas as I would have liked.  I should have made a larger stamped collage.

I enjoyed using beeswax, and will experiment further, incorporating dimensional items. Facial tissues are more robust that I thought, and I think I prefer them to tissue paper.

Happy romantic days!


Thursday, 11 April 2013

Pinch of salt, dash of lemon, & some wax makes .....

for a fun day crafting with friends!  Had a fab time yesterday, we tried several techniques, some successful, some not!

My favourite was using rock salt, which I have done before, but this time I used Adirondak colour washes on watercolour paper; but you could use anything, just ensure it is very wet!   The more absorbent watercolour paper gave a different effect than, say, on gloss card.  Some of my sprays refused to spray, so I just poured it on (after spritzing the paper with water), and scattered on rock salt.  Leave to dry for a few hours, and remove salt.   I love the effect, for backgrounds or die-cutting.


Next - wax crayons. Take a piece of card and parchment paper, heat the card through the parchment with an iron, then immediate start colouring with the crayons, which start to melt and blend. Keep heating and blending until happy.  Initially we stamped an image with Stazon, and coloured on top, but that just turned out a complete mess.  This is done in reverse, colouring with the melted crayons, and stamping on top - quite like this, but not really wow!


But, using the white crayon as a resist - now this is a very quick way to get highlights on a stamped image, and I'll be doing this technique again.  Stamp image or create a collage, use the white crayon where you don't want any colour.  Then colour with Distress Inks.  Buff to give more definition to highlights. Love it!  Here's two examples.


Of course, there is only one white crayon in a pack, so decided to try a candle.  Now this was a very old, stumpy thing, so not a lot of control, but you get the idea.


So, I'll be adding a candle to add to my craft tools!

The lemon thing was a bit of a disappointment.  Lemon juice, when heated, turns brown; so spritzed and heated, it should give an old and distressed look.  Bit of a faff really, the same effect can be obtained by flicking distress ink (from the brown palette) onto the card.  Here is both - and I can't tell the difference between the lemon and the distress ink.


For a quick, effective background stamp using Versamark and clear emboss. Take 4 Distress Inks -  different shades of one colour, and create strips of colour using post-it notes to mask off sections.  Use the lightest colour first all over the card, mask off a section where no further colour is required, take the next shade and go over remaining card; mask off another section, and repeat with next shade, and again with the darkest.  Quite effective.


And a good day was had by all!!!

Friday, 5 April 2013

Day dreaming

When will this bitter weather end - have we been transported to Narnia's perpetual winter?  That White Witch has a lot to answer for!  Please can someone send a search party out to find the sun .... and banish that east wind back to where it came from.

I've been yearning to feel some warm sunshine on my face, so decided to paint some! This is the same technique as I did for my earlier post - Singing the Blues.  Die-cuts on a canvas board, and several layers of Fresco paints.

I used 140lb hot pressed watercolour paper again, as I found that thin metal dies don't cut grunge paper very well. On the butterflies and bird, I used the negative of the die-cut, and stamped through it with white paint on a script stamp.

 I found some plywood words, and using "Dream", added some additional die-cuts to it, which are tiny pieces cut from larger ones. Used some copper Treasure Gold (guilding wax) to finish.


I think orange is now my happy colour!!